Finding a leak on a flat commercial roof starts inside the building. Mark the stain, measure its distance from two walls, then inspect the matching roof area. Check drains, seams, flashing, and penetrations first. Water often travels many feet across a flat roof before it drips indoors. Commercial Roofing Houston offers expert leak detection and repair for businesses across Houston, Katy, and Sugar Land.
This guide shows you each step in order. It also explains when professional moisture scanning saves time and money.
Where Do Flat Roof Leaks Usually Start?
Most flat roof leaks start at four spots. These include drains, seams, flashing, and rooftop penetrations. Houston’s heat and heavy rain stress each of these areas every year.
Start your search at these locations. They solve the majority of leak cases before any advanced testing begins.
Why the Stain Rarely Sits Below the Leak
A sloped roof sends water straight down. A flat roof gives water many paths to follow. It travels along the deck, through insulation, and beside pipes or conduit.
The entry point can sit 20 feet or more from the ceiling stain. This is why guessing wastes time and money. A clear method finds the source faster.
Houston adds another factor. Summer heat expands roofing membranes during the day. Evening cooling contracts them again. This daily cycle opens tiny gaps at seams and edges.
Tools You Need Before You Start
Gather a few simple tools before your inspection. Preparation makes the search safer and more accurate.
- A tape measure for interior stain locations
- A camera or phone for timestamped photos
- A push broom for clearing debris
- Marking tape or chalk for flagging defects
- A moisture meter for confirming wet areas
Professional crews add thermal cameras and capacitance scanners. These tools reveal moisture that the eye cannot see.
Step by Step: How to Find a Leak on a Flat Commercial Roof
Step 1: Document the Interior Stain
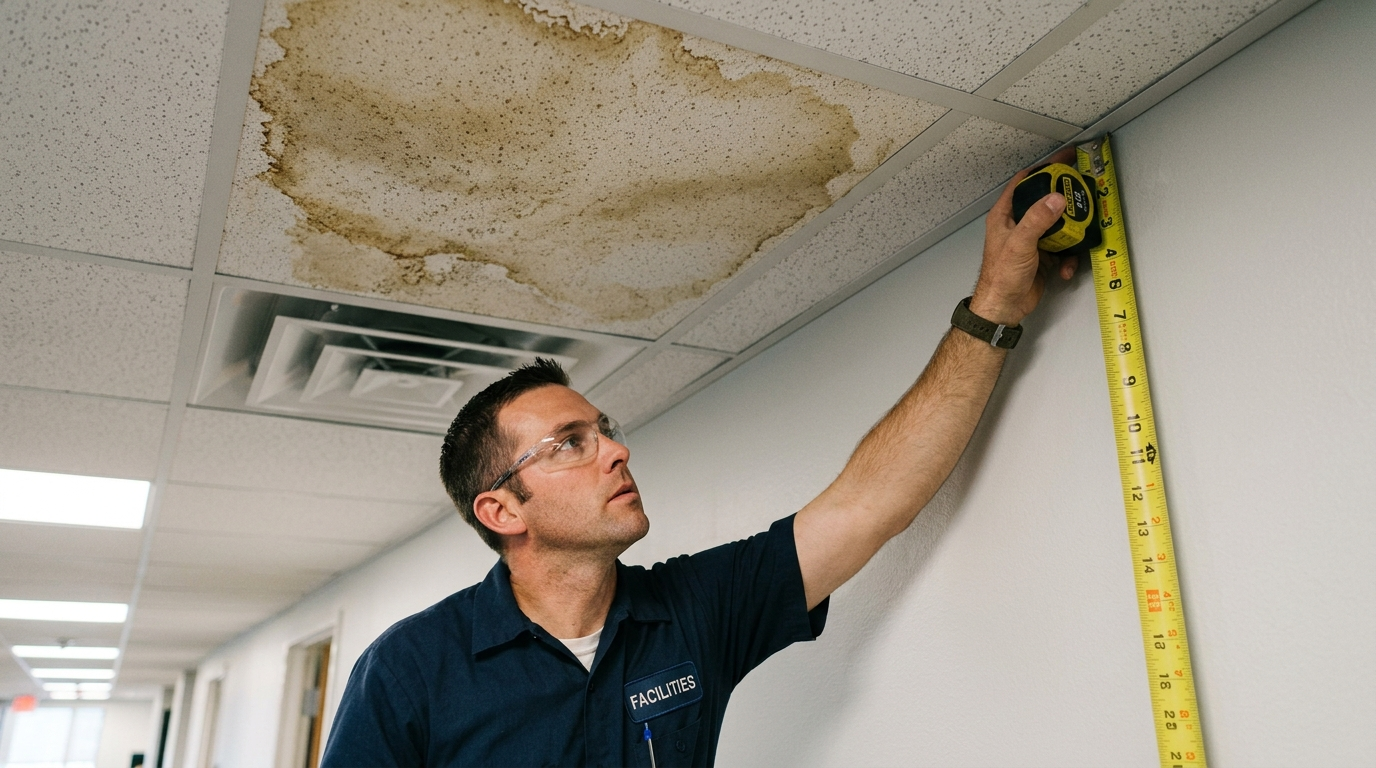
Photograph the stain before you touch anything. Measure its distance from two fixed walls. Record the date and any recent rainfall.
Move inventory, computers, and paperwork out of the drip zone. This protects your assets and creates records for insurance and warranty claims.
Step 2: Review Recent Weather and Timing
Note when the leak appears. Does it show up during heavy rain or after light drizzle? Does it appear on hot, dry days?
Leaks during heavy rain often point to drains or flashing. Leaks that appear after light rain may signal small membrane cracks. These patterns narrow your search before you reach the roof.
Step 3: Clear the Roof Surface
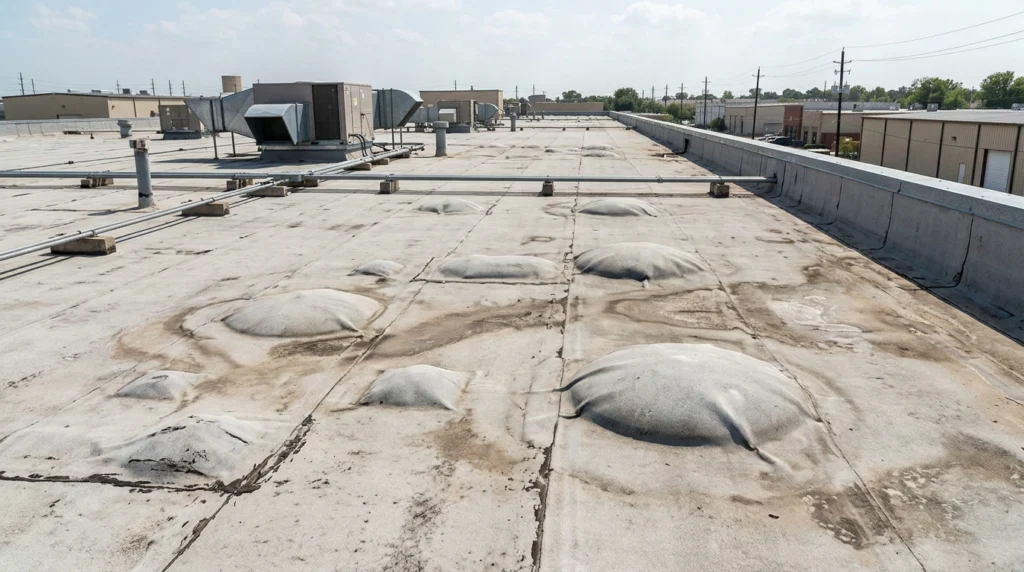
Sweep away leaves, branches, and buildup. Debris hides cracks, punctures, and clogged drains. Houston storms leave heavy debris on commercial roofs each season.
A clean surface also shows discoloration and staining clearly. These marks often trace the path of moving water.
Step 4: Inspect Drains and Low Areas
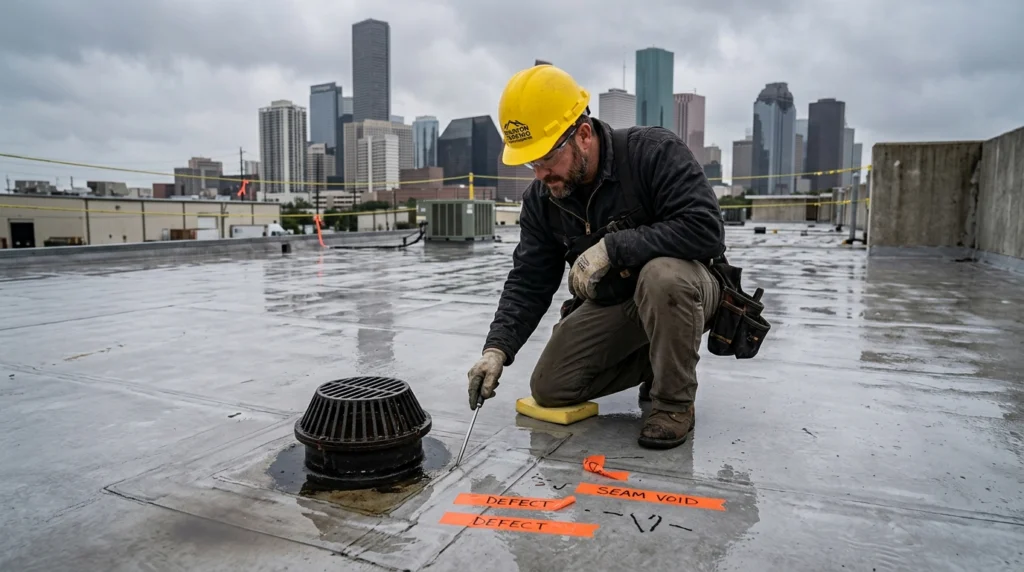
Start at the drains. Standing water near a drain usually means a blockage or settled roof surface. Water that stays longer than 48 hours needs attention.
Clear any clogs you find. Then check the surrounding membrane for softness, cracks, or staining. Many leaks end right here.
Step 5: Check Seams and Flashing
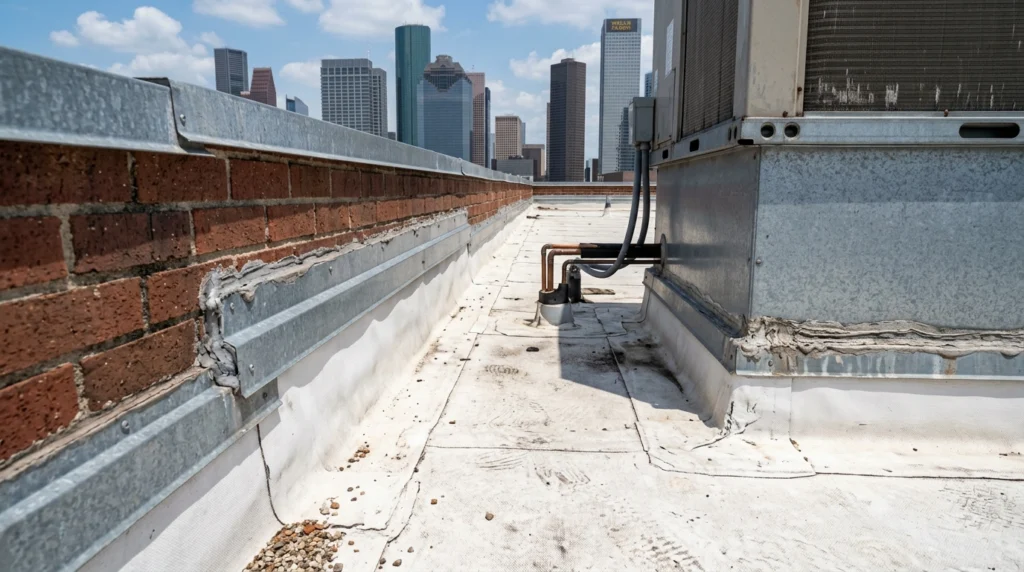
Walk the roof edges and every transition point. Inspect flashing around HVAC units, vent pipes, skylights, and parapet walls. Look for cracked sealant, lifted edges, and gaps.
Test seams gently with a probe. A seam that opens under light pressure needs repair. Our commercial roof repair team fixes these areas quickly and correctly.
Step 6: Scan the Membrane in a Grid
Divide the roof into sections. Walk each section slowly and look for punctures, blisters, and splits. Foot traffic and dropped tools cause many of these defects.
Each membrane type shows wear differently. Our comparison of TPO, EPDM, and PVC roofing membranes explains what to watch for on each system.
Step 7: Flag and Photograph Every Finding
Mark every defect with tape or chalk. Take one wide photo and one close photo of each spot. Number your markers so you can match them to your notes.
Many roofs have several small defects instead of one large hole. A complete record helps your contractor plan efficient repairs.
Common Leak Sources on Houston Flat Roofs
The table below shows where leaks usually start and what to look for.
| Leak Source | What to Look For | Why It Happens in Houston |
|---|---|---|
| Drains and scuppers | Standing water, debris, softened membrane | Heavy rain overwhelms blocked drainage |
| Seams | Open edges, lifted welds, failed adhesive | Daily heat cycles stress seam bonds |
| Flashing | Cracks, gaps, loose sealant | Wind driven storms loosen edges |
| Penetrations | Gaps around pipes, vents, and HVAC curbs | Equipment vibration and UV exposure |
| Membrane surface | Blisters, punctures, splits | Foot traffic and intense sun |
Use this list as a checklist during your walkthrough. Work from the highest risk items down.
Professional Leak Detection Methods
Some leaks hide beneath the membrane. Professional tools reveal them without cutting into the roof.
Infrared Thermal Scanning
Thermal cameras show temperature differences across the roof. Wet insulation holds heat longer than dry insulation. A dusk scan highlights these warm patches clearly.
This method covers large commercial roofs quickly. It maps hidden moisture with strong accuracy.

Capacitance and Moisture Meter Testing
Moisture meters confirm suspected wet areas during a walkthrough. Capacitance scanners read moisture levels beneath the surface. Technicians use both tools to verify findings before repairs begin.
Electronic Leak Detection
Electronic systems locate tiny breaches in waterproof membranes. Technicians send a small electrical signal across the surface. The signal pinpoints exact defect locations with impressive precision.
Core Sampling
Core sampling removes a small section of the roof layers. Lab analysis confirms moisture and deterioration inside the insulation. This method delivers clear answers for stubborn leaks.
Rooftop Safety Comes First
Rooftop work carries serious fall risks. OSHA requires fall protection when work happens six feet or more above a lower level. Skylights need covers or guardrails at all times.
Review the details in OSHA’s fall protection standard for walking and working surfaces. Avoid rooftop searches during rain or immediately after storms. Trained roofing professionals bring proper harnesses, anchors, and experience.
What to Do After You Locate the Leak
Take quick action to limit further water entry. Clear blocked drains and place a temporary cover if needed. Then schedule a permanent repair.
Permanent repairs must match your membrane type. TPO uses heat welded patches. EPDM uses compatible adhesive patches. Modified bitumen and built up roofs use torch applied or cold applied patches.
Roofs with many past patches may need a bigger solution. Our team can review commercial roof replacement options when repairs no longer deliver value. You can also read our guide on warning signs your Houston commercial roof needs repair to spot trouble early.
DIY Search or Professional Inspection?
A DIY search works well for simple, visible problems. Clogged drains, debris, and obvious flashing damage often fit this category. You save time and money when the fix is easy.
A professional inspection works better in these situations:
- The leak keeps returning after repairs
- The roof shows multiple stained areas indoors
- The roof has gravel surfacing or thick insulation
- Your warranty requires certified repairs
Professionals also protect your warranty. Many manufacturers require approved contractors for repair work.
How to Prevent Future Leaks
Prevention costs far less than emergency repairs. Follow these habits to protect your roof.
Schedule inspections twice a year, in spring and fall. Add an inspection after every major Houston storm. Keep drains and scuppers clear all year. Repair small defects immediately. Keep records of every inspection and repair.
These habits extend roof life and protect your building’s contents.
Frequently Asked Questions
How do I find a leak on a flat commercial roof?
Start at the interior stain and measure its position. Then inspect drains, seams, flashing, and penetrations near that area on the roof.
Why does water appear far from the actual leak?
Water travels along the roof deck, insulation, and pipes. It often moves many feet before it drips inside.
How much does leak detection cost in Houston?
Moisture scanning often costs between $500 and $2,000 depending on roof size. Individual leak repairs commonly range from $400 to $2,500.
How long does it take to find a commercial roof leak?
Simple leaks take a few hours. Hidden leaks may need a full day with thermal scanning and moisture testing.
Should I flood test my roof?
Use flood testing only as a last step. Controlled testing on small sections works best and limits extra water entry.
Book Professional Leak Detection in Houston
A methodical search finds flat roof leaks faster and protects your building. Our licensed team locates the exact source and repairs it with materials matched to your roof. We proudly serve businesses across Houston, Katy, and Sugar Land with fast, accurate leak detection.
Ready to stop that leak for good? Contact our team today for a free commercial roof inspection.